
终究开始整合了,3大工具各司其职。Struts负责与jsp交互,Spring针对javaBean的生命周期进行管理,myBatis负责数据库部份。
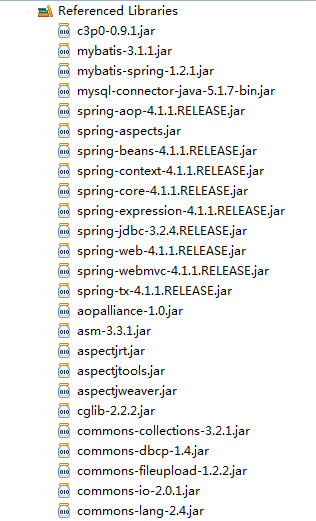
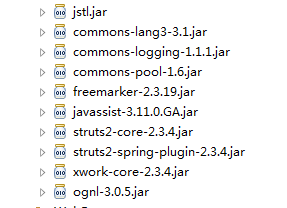
个人认为整合最重要的是找对相应的包,不然包之间便可能出现冲突,然后1直报错。以下是千辛万苦测试成功的包:
配置web.xml
<?xml version="1.0" encoding="UTF⑻"?>
<web-app version="2.5"
    xmlns="http://java.sun.com/xml/ns/javaee"
    xmlns:xsi="http://www.w3.org/2001/XMLSchema-instance"
    xsi:schemaLocation="http://java.sun.com/xml/ns/javaee
    http://java.sun.com/xml/ns/javaee/web-app_2_5.xsd">
  <display-name></display-name>
  <welcome-file-list>
    <welcome-file>index.jsp</welcome-file>
  </welcome-file-list>


  <!-- spring 加载文件配置 -->
  <context-param>
    <param-name>contextConfigLocation</param-name>
    <param-value>classpath:applicationContext.xml</param-value>
  </context-param>
  <!-- spring监听器配置 -->
  <listener>
    <listener-class>org.springframework.web.context.ContextLoaderListener</listener-class>
  </listener>

  <!-- 设置spring字符编码过滤器 -->
  <filter>
    <filter-name>characterEncoding</filter-name>
    <filter-class>org.springframework.web.filter.CharacterEncodingFilter</filter-class>
    <init-param>
        <param-name>encoding</param-name>
        <param-value>UTF⑻</param-value>
    </init-param>
  </filter>
  <filter-mapping>
    <filter-name>characterEncoding</filter-name>
    <url-pattern>/*</url-pattern>
  </filter-mapping>


   <!-- 配置Struts2 -->
  <filter>
    <filter-name>struts2</filter-name>
    <filter-class>org.apache.struts2.dispatcher.ng.filter.StrutsPrepareAndExecuteFilter</filter-class>
  </filter>
  <filter-mapping>
    <filter-name>struts2</filter-name>
    <url-pattern>/*</url-pattern>
  </filter-mapping>
</web-app>
配置applicationContext.xml
<?xml version="1.0" encoding="UTF⑻"?>
<beans xmlns="http://www.springframework.org/schema/beans"
    xmlns:xsi="http://www.w3.org/2001/XMLSchema-instance" xmlns:aop="http://www.springframework.org/schema/aop"
    xmlns:tx="http://www.springframework.org/schema/tx" xmlns:jdbc="http://www.springframework.org/schema/jdbc"
    xmlns:context="http://www.springframework.org/schema/context"
    xsi:schemaLocation="
             http://www.springframework.org/schema/beans http://www.springframework.org/schema/beans/spring-beans.xsd
             http://www.springframework.org/schema/aop http://www.springframework.org/schema/aop/spring-aop.xsd
             http://www.springframework.org/schema/jdbc
             http://www.springframework.org/schema/jdbc/spring-jdbc.xsd
             http://www.springframework.org/schema/tx
             http://www.springframework.org/schema/tx/spring-tx.xsd
             http://www.springframework.org/schema/context
             http://www.springframework.org/schema/context/spring-context.xsd">

    <!-- 采取注解的方式配置bean -->
    <context:annotation-config />
    <!-- 配置要扫描的包 -->
    <context:component-scan base-package="gyt.frame.first"></context:component-scan>


    <bean id="transactionManager"
        class="org.springframework.jdbc.datasource.DataSourceTransactionManager">
        <property name="dataSource" ref="dataSource" />
    </bean>

    <bean id="sqlSessionFactory" class="org.mybatis.spring.SqlSessionFactoryBean">
        <property name="configLocation" value="classpath:MyBatis.xml" />
        <property name="dataSource" ref="dataSource" />


    </bean>

    <bean id="dataSource" class="org.apache.commons.dbcp.BasicDataSource"
        destroy-method="close">
        <property name="url" value="jdbc:mysql://localhost:3306/SSM" />
        <property name="username" value="root" />
        <property name="password" value="123456" />
        <property name="maxActive" value="100" />
        <property name="maxIdle" value="5" />
        <property name="minEvictableIdleTimeMillis" value="300000" />
        <property name="timeBetweenEvictionRunsMillis" value="120000" />
        <property name="validationQuery" value="SELECT 1" />
        <property name="testWhileIdle" value="true" />
        <property name="testOnReturn" value="true" />
        <property name="testOnBorrow" value="true" />
    </bean>

    <bean id="userDao" class="org.mybatis.spring.mapper.MapperFactoryBean">
         <property name="sqlSessionFactory" ref="sqlSessionFactory" />
         <property name="mapperInterface" value="gyt.frame.first.UserDao" />
    </bean>

    <!-- 配置mybatis数据处理的方式,共4种方式,这里采取MapperScannerConfigurer方式 -->
    <!-- SqlSessionTemplate 这个需要写配置文件,在实现类中注入sqlsession,再使用sqlsession,是细颗粒控制
        SqlSessionDaoSupport 这个只需要在实现类中继承特殊类就能够使用sqlsession MapperFactoryBean 这个要写配置文件,把对应的所有接口在配置文件中援用便可,无需写实现类
        MapperScannerConfigurer 这个要写配置文件,只要给出接口所在的包便可,会自动把包中的接口引入,无需写实现类 -->

    <!-- jdbc初始化数据库 -->
    <!-- <jdbc:initialize-database data-source="dataSource" ignore-failures="NONE"
        enabled="true"> <jdbc:script encoding="utf⑻" location="/WEB-INF/db-init.sql"/>
        </jdbc:initialize-database> -->

    <!-- 配置哪些方法用甚么样的事务,配置事务的传播特性 -->
    <!-- <tx:advice id="txAdvice" transaction-manager="transactionManager">
        <tx:attributes> <tx:method name="add" propagation="REQUIRED"/> </tx:attributes>
        </tx:advice> <aop:config> <aop:pointcut id="pointcut" expression="execution(*
        D1.serviceimpl.UserServiceImpl.*(..))" /> <aop:advisor advice-ref="log" pointcut-ref="pointcut"/>
        </aop:config> -->
    <!-- 配置结束 -->


</beans>
applicationContext.xml里的重点:
⑴<context:annotation-config />,写了这句话才能使用注解的方式配置Bean。
⑵<context:component-scan base-package="gyt.frame.first"></context:component-scan>,配置需要扫描的包。如果某个类的头上带有特定的注解@Component,@Repository,@Service,@Controller,就会将这个对象作为Bean注册进Spring容器。扫描多个包用逗号隔开。
⑶<bean id="sqlSessionFactory" class="org.mybatis.spring.SqlSessionFactoryBean"> ,用于创建工厂Bean。
<property name="configLocation" value="classpath:MyBatis.xml" />
<property name="dataSource" ref="dataSource" />
</bean>
⑷<bean id="userDao" class="org.mybatis.spring.mapper.MapperFactoryBean"> ,创建dao bean(只需提供接口不需提供实现类 )。学习于http://blog.csdn.net/hupanfeng/article/details/21454847。
<property name="sqlSessionFactory" ref="sqlSessionFactory" />
<property name="mapperInterface" value="gyt.frame.first.UserDao" />
</bean>
配置struts.xml
<?xml version="1.0" encoding="UTF⑻" ?>
<!DOCTYPE struts PUBLIC
    "-//Apache Software Foundation//DTD Struts Configuration 2.1//EN"
    "http://struts.apache.org/dtds/struts⑵.1.dtd">


<struts>
     <!-- 指定默许编码集 ,作用于HttpServletRequest的setCharacterEncoding()和freemarker,vilocity的输出 -->
    <constant name="struts.i18n.encoding" value="UTF⑻"/>
    <!-- 当struts配置文件修改时是不是自动加载 -->
    <constant name="struts.configuration.xmlreload" value="true"/>
    <!-- 开发模式下打印详细的毛病信息,默许为false -->
    <constant name="struts.devMode" value="true"/>
    <!-- 标准的UI主题,默许的UI主题为xhtml,可以为simple,xhtml或ajax -->
    <constant name="struts.ui.theme" value="xhtml"/>


    <package name="test" namespace="/test" extends="struts-default">
        <action name="hello" class="gyt.frame.first.HelloAction">
            <result name="success">/jsps/HelloAction.jsp</result>
        </action>
    </package>

    <package name="user" namespace="/user" extends="struts-default">
        <action name="UserAction" class="gyt.frame.first.UserAction">
            <result name="success">index.jsp</result>
        </action>
    </package>
</struts>
配置myBatis.xml
<?xml version="1.0" encoding="UTF⑻"?>
<!DOCTYPE configuration PUBLIC "-//mybatis.org//DTD  Config 3.0//EN"
"http://mybatis.org/dtd/mybatis⑶-config.dtd">
<configuration>
    <!-- 映照文件,寄存sql语句的配置文件 -->
    <mappers>
        <mapper resource="gyt/frame/first/UserMappers.xml" />
    </mappers>

</configuration>
配置log4j.properties
log4j.rootLogger=info,A1
log4j.logger.com.mchange=warn,A1
log4j.additivity.com.mchange=false
log4j.logger.org.hibernate=warn,A1
log4j.additivity.org.hibernate=false
log4j.logger.com.ibatis=warn,A1
log4j.additivity.com.ibatis=false
# ConsoleAppender
log4j.appender.A1=org.apache.log4j.ConsoleAppender
log4j.appender.A1.layout=org.apache.log4j.PatternLayout
log4j.appender.A1.layout.ConversionPattern=%-d{yyyy-MM-dd HH\:mm\:ss,SSS} [%c]-[%p] %m%n
# \u6253\u5370sql
log4j.logger.org.apache.ibatis=debug
log4j.logger.java.sql.Connection=debug
log4j.logger.java.sql.Statement=debug
log4j.logger.java.sql.PreparedStatement=debug
log4j.logger.java.sql.ResultSet=debug
#com.frame
log4j.logger.com.frame=debug
创建表
CREATE TABLE `user` (
  `UserNo` varchar(10) NOT NULL,
  `DepartmentNo` varchar(10) DEFAULT NULL,
  `UserName` varchar(10) DEFAULT NULL,
  `Password` char(16) DEFAULT NULL,
  `Email` varchar(40) DEFAULT NULL,
  PRIMARY KEY (`UserNo`)
) ENGINE=InnoDB DEFAULT CHARSET=utf8;
新建1个action类UserAction.java
/*
 Action注解单例问题
交有spring管理后,action默许是单例模式。但是项目不能全部都采取单例,使用我们需要加入相干注解切换为非单例:
在action上面配置,@Scope("prototype") ,每一个要求都会new1个新的实例
 */

@Controller
@Scope("prototype")
public class UserAction extends ActionSupport {
    /**
     *
     */
    private static final long serialVersionUID = 1L;
    @Autowired
    //@Resource(name="userservice")
    private UserService userservice;// 使用@Autowired,要写setter方法。
    private User user=new User();//不写New,将报空指针
    public User getUser() {
        return user;
    }

    public void setUser(User user) {
        this.user = user;
    }


    public UserService getUserservice() {
        return userservice;
    }

    public void setUserservice(UserService userservice) {
        this.userservice = userservice;
    }

    public static long getSerialversionuid() {
        return serialVersionUID;
    }
    public String insert(){
        user.setUserNo(user.getUserNo());
        user.setDepartmentNo(user.getDepartmentNo());
        user.setUserName(user.getUserName());
        user.setPassword(user.getPassword());
        user.setEmail(user.getEmail());
        System.out.println(user.getUserName()+"   insert");
        this.userservice.insert(user);
        return SUCCESS;
    }

}
dao接口
UserDao.java
@Repository
@Transactional
public interface UserDao {
    public void insert(User user);
}
UserMappers.xml
<?xml version="1.0" encoding="UTF⑻"?>
<!DOCTYPE mapper PUBLIC "-//mybatis.org//DTD Mapper 3.0//EN"
"http://mybatis.org/dtd/mybatis⑶-mapper.dtd">
<mapper namespace="gyt.frame.first.UserDao">
    <insert id="insert">
        insert into User (UserNo,DepartmentNo,UserName,Password,Email) values(

        #{UserNo,jdbcType=VARCHAR},
        #{DepartmentNo,jdbcType=VARCHAR},
        #{UserName,jdbcType=NUMERIC},
        #{Password,jdbcType=VARCHAR},
        #{Email,jdbcType=VARCHAR})
    </insert>
    </mapper>
这里注意namespace不要写错,id为类里面的某个方法。不然会报错。
service接口UserService.java
public interface UserService {

    public void insert(User user);

}
service实现类
/*
 Bean注解管理
 Spring自动扫描管理Bean注解有4种配置模式,以下
 @Service     用于业务层(service) 示例:@Service("baseService")
 @Controller  用于控制层(action)  示例:@Controller("baseAction")
 @Repository  用于数据访问层(dao) 示例:@Repository("baseDao")
 @Component   泛型配置(当组件不肯定时用),以上3种配置是基于此扩大
 */
/*
 @Service自动装配到Spring的容器,为其他组件提供服务;
 通过@Transactional进行事务的管理;
 通过@Resource注入UserDao对象。
 */
@Service
@Transactional
public class UserServiceImpl implements UserService{
    @Autowired
    private UserDao userdao;

    public void insert(User user) {
        this.userdao.insert(user);

    }

}
user.jsp
<body>
   <!--   <form action="user/UserAction!insert.action">
    编号:<input name="UserNo"><br>
    部门编号:<input name="DepartmentNo"><br>
    姓名:<input name="UserName"><br>
    密码:<input name="Password"><br>
    邮箱:<input name="Email"><br>
        <input type="submit" value="肯定">
    </form>-->

       <form action="user/UserAction!insert.action">
    编号:<input name="user.UserNo"><br>
    部门编号:<input name="user.DepartmentNo"><br>
    姓名:<input name="user.UserName"><br>
    密码:<input name="user.Password"><br>
    邮箱:<input name="user.Email"><br>
        <input type="submit" value="肯定">
    </form>
  </body>
此进程学习于 http://blog.csdn.net/yunsyz/article/details/17187659
超级感谢。

上一篇 单向散列加密
下一篇 [置顶] ELK(ElasticSearch, Logstash, Kibana)+ SuperVisor + Springboot + Logback 搭建实时日志分析平台
程序员人生,我编程,我富裕,记住wfuyu网,php教程,php学习,php手册,CMS模版制作
声明:本站大部分内容是作者原创,少部分收集于互联网供大家一起学习,原版权很多不明,如有侵权请联系本站,谢谢!
粤ICP备14040726号-1 2015-2020 程序员人生 版权所有


