
本文是我搜集的1些使用Photoshop来实现Instagram滤镜的1些内容,在这里跟大家分享1下,这些效果是完全可使用程序实现的,这个感兴趣的可使用ZPHOTOENGINE库来实现,这个PS算法库的下载地址:点击打开链接
下面开始介绍Amaro滤镜实现的内容,这些内容是英文版的,对不懂英文的,直接看PS操作图便可。
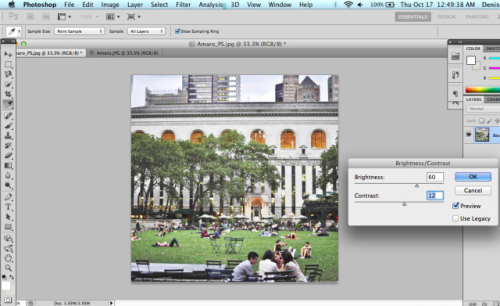
1. First, increase the brightness and contrast of your picture. Do this by going to Image > Adjustments > Brightness/Contrast.
2. To add a soft yellow light, create a new fill layer over the photo. Go to Layer > New Fill Layer > Solid Color. Play around until you find a good shade, or you could just enter the shade I used in the hex color code field: #f4eabd.
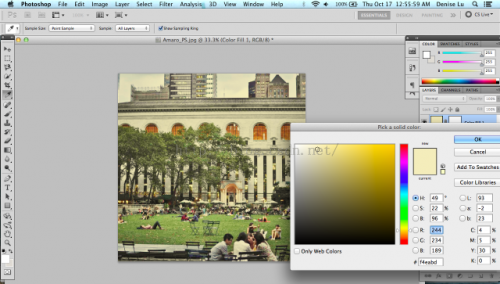
3. Click OK. While you still have the layer selected, click on the dropdown menu right above it and select "Multiply" instead of the default of "Normal." This will add a soft light over your photo as opposed to an opaque layer.
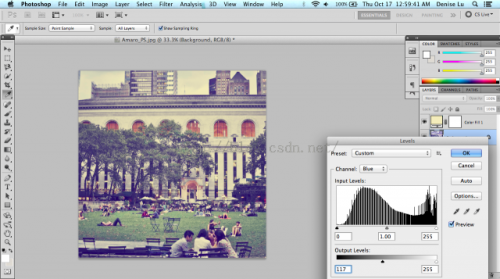
4. Next, open up the Levels menu. You can do this with Command / Ctrl + L, or you can go to Image > Adjustments > Levels. In the dropdown menu for "Channel," select "Blue." Increase the Output Levels at the bottom of the menu from 0 to 117 by dragging the left slider towards the center of the spectrum. This will add a blue tint to the photo.
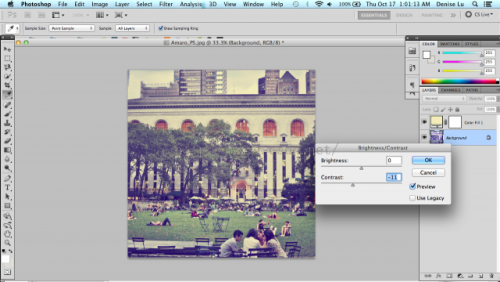
5. From here, I had to make some more minor adjustments by decreasing the Contrast a bit more to give it a faded look.
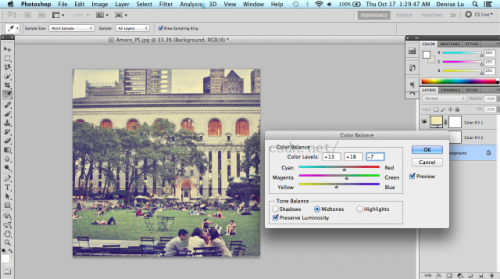
6. Next, open up Color Balance with Command / Ctrl + B, or Image > Adjustments > Color Balance. Make sure the radio dial below is set to "Midtones." Play around until you have a good blend of colors, but I chose to increase my Red, Green and Yellow levels.
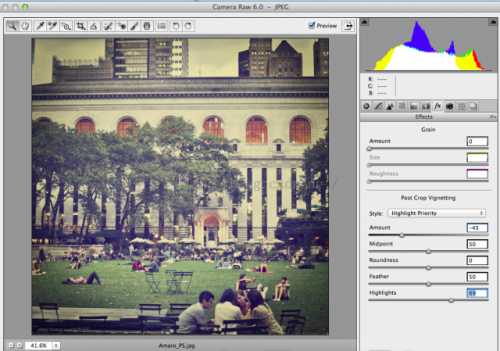
7. Finally, save the image as is and reopen it up in Camera Raw to add a vignette frame. You can do this by exiting out of the current window, then going to File > Open. Select the correct file, then select "Camera Raw" in the "Format" dropdown menu.
8. Once you have the file open in Camera Raw, select the Effects menu on the right-hand side of the editor. Make sure that "Highlight Priority" is selected in the "Style" dropdown menu. Move the "Amount" slider left to make a black vignette around the edges of the photo. Once youre satisfied with the vignette, move the "Highlights" slider to the right so that the vignette will not affect the highlights as much. Click "Save Image" once youre done.

程序员人生,我编程,我富裕,记住wfuyu网,php教程,php学习,php手册,CMS模版制作
声明:本站大部分内容是作者原创,少部分收集于互联网供大家一起学习,原版权很多不明,如有侵权请联系本站,谢谢!
粤ICP备14040726号-1 2015-2020 程序员人生 版权所有


