[置顶] android网络编程学习与实战之旅一<HttpUrlConnection上传单个或多个文件>
来源:程序员人生 发布时间:2016-07-28 09:28:35 阅读次数:3031次
1.HttpUrlConnection类概述
HttpUrlConnection是1个HTTP协议的UrlConnection,用于通过web收发数据。数据可以是任意类型和长度。这个类主要用于收发提早不知长度的数据流。
这个类的用法遵守以下模式:
- 首先取得1个HttpUrlConnection的实例。通过调用URL类中的openConnection()函数。并做强迫类型转换。
- 准备要求。要求的基本属性是1个URL,要求头可能包括1些元数据,比如:证书, 首选的内容类型,session和cookie等。
- 可选的上传1个要求体。HttpUrlConnection的实例如果包括1个要求体的话,必须使用setDoOutput(true)函数设置1下。然后可以通过getOutPutStream取得1个输出流,向流中写入数据便可传输数据。
- 读响应。典型响应头包括着这样1些元数据,比如:1.响应体的内容类型和长度,2.修改的日期,3.session和cookie等。响应体可以从getInputStread()返回的流中读取。如果响应没有响应体,getInputStread()返回为空。
- 断开连接。1旦响应体被读取,HttpUrlConnection应当通过调用disconnect()方法来关闭。这个关闭会释放这个连接所持有的资源。
根据上述要求,初步写以下实验程序,这个程序的功能就是向服务器发送1个要求,并取得服务器的响应,把这些响应显示在1个TextView中。
<span style="font-family:SimSun;font-size:14px;">public class MainActivity extends AppCompatActivity {
URL url = null;
TextView textView;
Handler handler;
@Override
protected void onCreate(Bundle savedInstanceState) {
super.onCreate(savedInstanceState);
setContentView(R.layout.activity_main);
textView = (TextView) findViewById(R.id.text);
Log.d("hello","oncreate");
handler = new Handler(new Handler.Callback() {
@Override
public boolean handleMessage(Message msg) {
Log.d("hello",msg.getData().getString("name"));
textView.setText(msg.getData().getString("name"));
return true;
}
});
new Thread(new Runnable() {
HttpURLConnection connection;
@Override
public void run() {
try {
url = new URL("https://www.baidu.com/?tn=57095150_1_oem_dg");
connection = (HttpURLConnection) url.openConnection();
InputStream in = new BufferedInputStream(connection.getInputStream());
BufferedReader bufferedReader = new BufferedReader(new InputStreamReader(in));
StringBuilder stringBuilder = new StringBuilder();
String line;
while ((line=bufferedReader.readLine())!=null){
stringBuilder.append(line);
}
Message message = new Message();
Bundle bundle= new Bundle();
bundle.putString("name",stringBuilder.toString());
message.setData(bundle);
handler.sendMessage(message);
} catch (MalformedURLException e) {
e.printStackTrace();
} catch (IOException e) {
e.printStackTrace();
}finally {
connection.disconnect();
}
}
}).start();
}
}</span>
这段代码访问https://www.baidu.com/?tn=57095150_1_oem_dg页面,并把取得的内容放到Textview中显示。需要注意的几点:
- Android的Ui线程不可以访问网络等耗时的工作,所以这里将其放在1个子线程中。
- TextView1页可能显示不完,最好把TextView放到1个ScrollView中,这样就能够向下转动查看所有内容了。
- 使用Handler可Message更新UI.
- 不要忘记添加网络访问权限:
<uses-permission android:name="android.permission.INTERNET"></uses-permission>
1.2.基于HTTPS安全连接
首先也是使用openConnection()方法取得1个HttpsURLConnection实例。这个URL固然是使用“https://”开头的URL.它允许覆写
HostnameVerifier 和SSLSocketFactory接口。1个支持SSLSocketFactory的利用程序可以提供1个自定义的X509TrustManager,
用于证书链的验证,并且1个自定义的X509KeyManager用于客户真个验证。
1.3.发送内容
为了上传数据到服务器,配置连接为输出,使用setDoOutput(true),为了更高实现更好的额性能,是使用setFixedLengthStreamingMode(int)
设置数据长度,如果数据长度提早可以知道的话,或使用setChunkedStreamingMode(int)当不知道数据长度的时候。否则,
HttpUrlConnection将
2.上传1张或多张图片到服务器
通过以上理论知识的学习,上传1张图片到服务器成为可能,为了完成这个功能,首先需要解决以下问题:
解决方法是:自己搭建Apache服务器,接收使用php好了,由于php之前略有涉略,其他的Web服务器真个语言均1无所知。
上传的文件在哪里呢?简单起见,就是放在assets目录下的文件。assets目录下的文件可使用AssetManager进行管理,非常方便,为了使用assets目录,在实现上传文件功能之前,先做这样1件尝试:
2.1把assets目录下的1张图片显示到ImageView中
这是很简单的1步,为了项目的完全,还是把它贴出来,这是1个读assets目录下文件的方法:
<span style="font-family:SimSun;font-size:14px;"> public Bitmap readAssetsFile(String name){
Bitmap image = null;
InputStream inputStream = null;
try {
inputStream = getResources().getAssets().open(name);
image = BitmapFactory.decodeStream(inputStream);
} catch (IOException e) {
e.printStackTrace();
}
finally {
if(inputStream != null) try {
inputStream.close();
} catch (IOException e) {
e.printStackTrace();
}
}
return image;
}</span>
2.2 php保存上传的文件
由于我对php只是了解性的学习过,所以这部份也单独拿出来,先把它做好,然后再往下做。这个进程分为以下几步:
- 先搭建好服务器,建议直接装wamp,这个比较简单,然后启动它。
- 使用html给上传文件,并用php脚本接受文件,确保php可以正常工作。
- 编写android端代码并且测试。
服务器的搭建这里就不啰嗦了,启动它也没啥好说的,现在测试使用html上传文件,并用php接受的代码。
html的代码以下:
<span style="font-family:SimSun;font-size:14px;"><!DOCTYPE html>
<html>
<head>
<meta http-equiv="Content-Type" content="text/html; charset=utf⑻" />
<title>file upload</title>
</head>
<body>
<form action="http://127.0.0.1:8088/php/fileupload.php" method="post" enctype="multipart/form-data">
<input type="file" name="myfile" class="file" id="fileField" onchange="document.getElementById('textfield').value=this.value" />
<input type="submit" name="submit" value="上传" />
</form>
</body>
</html></span>
这个代码非常简单,就是使用1个表单上传文件。它的模样是这样的:
php代码以下:
<span style="font-family:SimSun;font-size:14px;"><pre name="code" class="php"><?php
echo "file arrived";
echo "Upload: ".$_FILES["myfile"]["name"]."<br />";
echo "Type: ".$_FILES["myfile"]["type"]."<br />";
echo "Size: ".($_FILES["myfile"]["size"]/1024)." Kb<br />";
echo "Temp file: " . $_FILES["myfile"]["tmp_name"]."<br />";
if (file_exists("D:/wamp/www/"."upload/" . $_FILES["myfile"]["name"]))
{
echo $_FILES["myfile"]["name"]." already exists. ";
}
else
{
if(move_uploaded_file($_FILES["myfile"]["tmp_name"],"D:/wamp/www/"."upload/" . $_FILES["myfile"]["name"])){
echo "Stored in: " . "upload/" . $_FILES["myfile"]["name"];
}else{
echo "Store failed";
}
}
?></span>
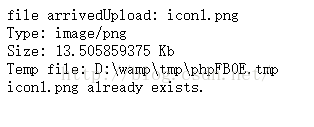
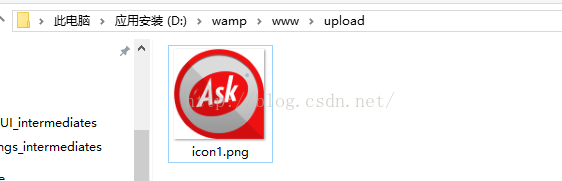
这段代码中,为了方便调错,首先将上传文件的信息都打印出来。然后 判断这个文件在服务器的upload目录下存在不?存在就甚么都不做,不存在就把它存储下来。这里要注意:文件的路劲要用绝对路劲,不然会报错,甚么缘由这里就不深究了,反正加上绝对路劲就能够了。就这样简简单单的1些代码,就实现了文件的上传与保存。这些代码主要用来测试服务器端可以正常的接受并且保存文件。有了这些验证,我们就能够安心的专注于Android真个代码了。这里把这段代码接遭到上传文件后页面与文件上传到服务器的情形给个交代:
2.3android端上传文件的代码
在正式写代码之前,先回顾1下第1小节的基础内容。通过第1小节的学习,知道了怎样访问1个服务器,怎样获得服务器的响应,怎样发送数据块给服务器。可以想象1下,上传1张图片就是把1个数据块发送给服务器,所以这里的知识已基本具有了。但是为了更好的理解HttpUrlConnection这个类,在看看这个类的API文档,耐心的把它看完,写代码是1件不用着急的事情。
2.3.1性能
为了能写出比较好的代码,学习如何提高性能是很有必要的。除1.3介绍的设置发送的内容的长度或明确告知不知道数据内容长度外,还需要注意甚么呢?
- 这个类返回的输入输出流是不缓冲存。大部份时候都需要把输入输出流包装为缓冲流。如果是直接简单的对大块数据进行读写,也能够疏忽缓存。
- 为了减少延迟,这个类可能会为多个要求/ 响应对使用相同的底层的socket。这致使http连接会保持打开状态很长时间,所以当不要连接的时候。通过设置http.keepAlive系统属性为false,这类行动可以被制止。使用http.maxConnections可以设置每一个连接到服务器的最大的空闲连接的数目。
- 默许的,这个类要求服务器的时候会使用gzip自动紧缩,并且当调用者调用getInputSream时会自动解紧缩。这类情况下,Content-Encoding 和Content-Length要被声明,gzip紧缩可以被关闭使用以下方法:
<span style="font-family:SimSun;font-size:14px;">urlConnection.setRequestProperty("Accept-Encoding", "identity");</span>
- getContentLength()可以取得传输的字节数,但是不能被用作获得getInputStread中可被读取的字节数。取而代之的是,应当使用read()方法,直到它返回⑴。表明数据读完。
2.3.2处理登录
1些wifi网络阻塞用户访问因特网,直到用户通过登录页面。这类登录页面典型的代表是使用http重定向。你可使用getUrl()方法可以坚持连接有无被意外的重定向。这类检查在已接遭到响应头以后就不可用了,这里的响应头的获得可使用
getHeaderFields() 或getInputStream()方法。比如,为了检查1个响应有无重定向到另外1个主机,可以像以下这样:
<span style="font-family:SimSun;font-size:14px;"> HttpURLConnection urlConnection = (HttpURLConnection) url.openConnection();
try {
InputStream in = new BufferedInputStream(urlConnection.getInputStream());
if (!url.getHost().equals(urlConnection.getURL().getHost())) {
// we were redirected! Kick the user out to the browser to sign on?
...
} finally {
urlConnection.disconnect();
}
}</span>
2.3.2HTTP认证
HttpUrlConnection支持HTTP基本的认证功能。使用Authenticator支持虚拟机级别的认证处理:
<span style="font-family:SimSun;font-size:14px;"> Authenticator.setDefault(new Authenticator() {
protected PasswordAuthentication getPasswordAuthentication() {
return new PasswordAuthentication(username, password.toCharArray());
});
}</span>
除非使用HTTPS,否则,这不是1种安全的用户认证方式。特别是,用户名,密码,要求,响应都没有被加密却在网络间传递。
2.4rfc1867协议
http本来不支持文件上传,为了支持文件上传,rfc1867协议对其做了修改,主要设计两方面:要求头的修改和要求体的修改。
2.4.1要求头的修改
Content-Type由原来的
Content-Type: application/x-www-form-urlencoded
改成了:
Content-Type: multipart/form-data; boundary=------⑺d71f4234700b8
其中,mutipart/form-data;是必须的,boundary再要求体中用到,它会把要求体分成多个块,1块代表1块独立的数据,或说是文件吧。
2.4.2要求体的修改
<span style="font-family:SimSun;font-size:14px;">----------------------------⑺d71f4234700b8
Content-Disposition: form-data; name="formhash"
59329e15
----------------------------⑺d71f4234700b8
Content-Disposition: form-data; name="isblog"
----------------------------⑺d71f4234700b8
Content-Disposition: form-data; name="fid"
104
----------------------------⑺d71f4234700b8</span>
可以看到要求体编程了多个块,每块可以代表1个独立的文件。这里的name和php中$_FILES_[name]保持1致,也和input标签的name属性的值保持1致。后面还可加文件名,文件长度等信息。
2.5正式写android代码
2.5.1上传1个文件
android的代码主要难点是设置http和rfc1867协议的1些参数,那现在就以下面1个完全的POST要求的格式为例,逐条配置android代码:
<span style="font-family:SimSun;font-size:14px;">POST /upload_file/UploadFile HTTP/1.1
Accept: text/plain, */*
Accept-Language: zh-cn
Host: 192.168.29.65:80
Content-Type:multipart/form-data;boundary=--------------------------⑺d33a816d302b6
User-Agent: Mozilla/4.0 (compatible; OpenOffice.org)
Content-Length: 424
Connection: Keep-Alive ----------------------------⑺d33a816d302b6
Content-Disposition:form-data;
name="userfile1";
filename="E:\s"Content-Type:
application/octet-stream abbXXXccc
----------------------------⑺d33a816d302b6
Content-Disposition: form-data;
name="text1" foo
----------------------------⑺d33a816d302b6
Content-Disposition: form-data;
name="password1" bar
----------------------------⑺d33a816d302b6-- </span>
下面的代码逐条配置了上面模板中的条目,代码中注释有很详细的解释:<span style="font-family:SimSun;font-size:14px;">package com.konka.networktest;
import android.content.Context;
import android.content.res.AssetManager;
import android.os.Bundle;
import android.os.Handler;
import android.os.Message;
import java.io.BufferedReader;
import java.io.DataOutputStream;
import java.io.IOException;
import java.io.InputStream;
import java.io.InputStreamReader;
import java.net.HttpURLConnection;
import java.net.MalformedURLException;
import java.net.URL;
/**
* Created by Jinwei on 2016/6/29.
*/
public class Utils {
public static void doupLoadPic(Context context, Handler handler){
//首先设置1些常量
final String end = "\r\n";
final String twoHyphens = "--";
final String boundary = "******";
URL url = null;
HttpURLConnection httpURLConnection = null;
//1.创建URL,并且获得连接
try {
url = new URL("http://192.168.0.103:8088/php/fileupload.php");
httpURLConnection = (HttpURLConnection) url.openConnection();
//2.根据这个类的使用要求,要配置1些必要的参数
httpURLConnection.setChunkedStreamingMode(128 * 1024);// 128K,这个配置可以提高性能
httpURLConnection.setDoOutput(true); //允许输出。
httpURLConnection.setDoInput(true); //允许读入,后面我们要读取
服务器端返回的信息
httpURLConnection.setUseCaches(false); //不使用缓冲
//3.设置rfc1867要求头
//3.1要求行设置 POST /upload_file/UploadFile HTTP/1.1
httpURLConnection.setRequestMethod("POST"); //要求行只需设置这1个参数便可
//3.2 Accept: text/plain, */*
httpURLConnection.setRequestProperty("Accept","ext/plain, */*");
//3.3 Accept-Language: zh-cn
httpURLConnection.setRequestProperty("Accept-Language","zh-cn");
//3.3 Host: 192.168.0.105:80
//Host 接受响应的主机,默许就是发起连接的这里,所以这里不设置
//3.4 Content-Type:multipart/form-data;boundary=--------------------------⑺d33a816d302b6
httpURLConnection.setRequestProperty("Content-Type","multipart/form-data;boundary="+boundary);
//3.5 //User-Agent: Mozilla/4.0 (compatible; OpenOffice.org)
//阅读器类型,和我们无关,不设置
//3.6 //Content-Length: 424
//数据长度,这个类不是可以收发不知长度的数据流吗?我们不知道长度的话就不设置了。
//3/7 //Connection: Keep-Alive ----------------------------⑺d33a816d302b6
httpURLConnection.setRequestProperty("Connection","Keep-Alive");//这里要注意,keep-Alive后面的是要求体中的内容了。所以,要求头就设置完了
//4,设置要求体
//4.1获得输出流
DataOutputStream dout = new DataOutputStream(httpURLConnection.getOutputStream());
//4.2 写分隔符,先把Keep-Alive后面的事情做完
dout.writeBytes("--"+boundary+end);
//4.3 Content-Disposition:form-data;
dout.writeBytes("Content-Disposition:form-data;");
//4.4 name="userfile1";
dout.writeBytes("name="+"\"myfile\";");
//4.5 filename="E:\s"
dout.writeBytes("filename="+"\"one.jpg\"");
//注意这里以后有两个回车换行
dout.writeBytes(end);
dout.writeBytes(end);
//4.6 application/octet-stream abbXXXccc,这里就是正文了,而正文需要读文件,以下是读文件的部份
AssetManager am = context.getAssets();
InputStream inputStream = am.open("one.jpg");
//4.7有了文件输入流后,我们把文件读出来,写到http要求体中
byte[] buffer = new byte[8192]; // 8k
int count = 0;
while ((count = inputStream.read(buffer)) != ⑴) {
dout.write(buffer, 0, count);
}//这样文件就写完了
//我们只有1个文件,就这样就能够了。依照格式,文件结束还要写入分隔符
dout.writeBytes(end+"--"+boundary+end);
//这样发送部份就做完了。
//另外,我们还希望接受返回的数据。
//1.打开读流
BufferedReader br = new BufferedReader(new InputStreamReader(httpURLConnection.getInputStream(),"utf⑻"));
StringBuilder builder = new StringBuilder();
String result;
//2.开始读入
while((result = br.readLine())!= null){
builder.append(result);
}
//通知UI更新
Message message = new Message();
Bundle bundle= new Bundle();
bundle.putString("name",builder.toString());
message.setData(bundle);
handler.sendMessage(message);
//最后做1些清算工作
br.close();
inputStream.close();
dout.close();
httpURLConnection.disconnect();
} catch (MalformedURLException e) {
e.printStackTrace();
} catch (IOException e) {
e.printStackTrace();
}
}
}
</span>
2.5.2上传多个文件
只要会上传1个文件,而且知道了上传多个文件就是使用"--"+boundary+"/r/n"把多个文件分开,然后在分割附后添加文件的类型,文件名等信息就能够了,以以下出添加的代码:
<span style="font-family:SimSun;font-size:14px;"> //发送第2个文件
//boundary已写入了,现在写文件的类型,名字等信息
//4.3 Content-Disposition:form-data;
dout.writeBytes("Content-Disposition:form-data;");
//4.4 name="userfile1";
dout.writeBytes("name="+"\"myfile1\";");
//4.5 filename="E:\s"
dout.writeBytes("filename="+"\"two.jpg\"");
//注意这里以后有两个回车换行
dout.writeBytes(end);
dout.writeBytes(end);
//打开第2个文件的流
InputStream inputStream1 = am.open("two.jpg");
while ((count = inputStream1.read(buffer)) != ⑴) {
dout.write(buffer, 0, count);
}//这样第2个文件就写完了
inputStream1.close();
//写入分隔符
dout.writeBytes(end+"--"+boundary+end);</span>
服务器端也只是简单的把接受1个文件的代码复制1份:
<span style="font-family:SimSun;font-size:14px;">//第2个文件
echo "second file arrived";
echo "Upload: ".$_FILES["myfile1"]["name"]."<br />";
echo "Type: ".$_FILES["myfile1"]["type"]."<br />";
echo "Size: ".($_FILES["myfile1"]["size"]/1024)." Kb<br />";
echo "Temp file: " . $_FILES["myfile"]["tmp_name"]."<br />";
if (file_exists("D:/wamp/www/"."upload/" . $_FILES["myfile1"]["name"]))
{
echo $_FILES["myfile1"]["name"]." already exists. ";
}
else
{
if(move_uploaded_file($_FILES["myfile1"]["tmp_name"],"D:/wamp/www/"."upload/" . $_FILES["myfile1"]["name"])){
echo "Stored in: " . "upload/" . $_FILES["myfile1"]["name"];
}else{
echo "Store failed";
}
} </span>
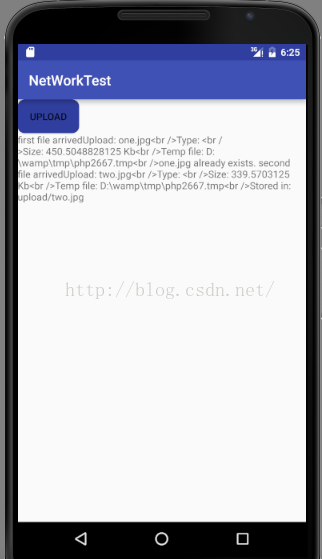
手机端收到的信息:
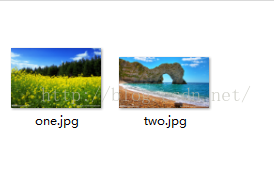
服务器端多了两个文件:
生活不易,码农辛苦
如果您觉得本网站对您的学习有所帮助,可以手机扫描二维码进行捐赠