
斟酌到V7包实在大—–既庞大又强大 , 请所有预会的同学到门口来
我们先拍1张全家福:
1 . android.support.v7.widget.Toolbar
2 . android.support.v7.widget.CardView
3 . com.android.support:recyclerview-v7:xx
4 . com.android.support:design包.FloatingActionButton
5 . com.android.support:design包.TextInputLayout
6 . com.android.support:design包.Snackbar
7 . com.android.support:design包.TabLayout
8 . com.android.support:palette-v7:xx
9 . com.android.support:design包.CoordinatorLayout
10 . com.android.support:design包.AppBarLayout
11 . com.android.support:design包.CollapsingToolbarLayout
12 . com.android.support:design包.NavigationView
在这里向大家推荐下百度文库里面的1篇文章 , 他介绍这个神秘家族:
http://wenku.baidu.com/link?url=UxYI_7hJDe83IdBNgOhX9wFlf9HCnzdlq5N92FllkIWaMLev0zUzyGSV9OJ1_0CryMJdX4IiHZCXiBvdrtBFvxJin_rjHO8iretMVCpnacO
然后大家逐一自我介绍下:
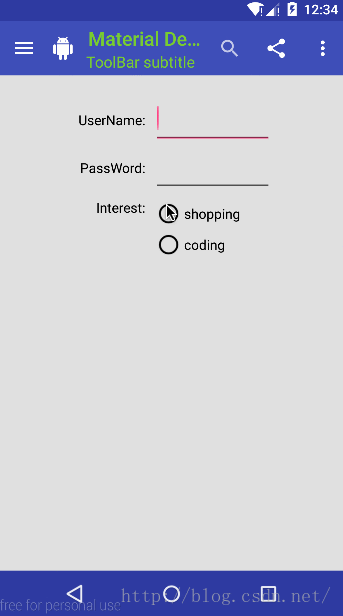
1 . android.support.v7.widget.Toolbar
使用方法:
1.援用v7 的appcompat 包
2.使用Toolbar的Activity要继承AppCompatActivity
3.需要更改主题为NoActionbBar的主题
4.在布局文件中援用Toolbar , 需援用v7包中的Toolbar , 默许的Toolbar 仅支持 API >= 21 (android 5.0)的系统
5.在代码中调用setSupportActionBar(toobar) 方法将Toolbar绑定到当前界面
优秀作品展现:
博客推荐 : http://blog.csdn.net/javazejian/article/details/50451853
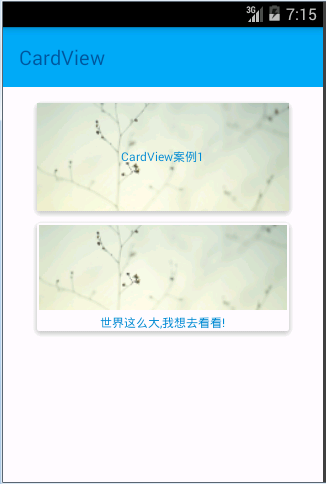
2 . android.support.v7.widget.CardView
继承自FrameLayout并实现了圆角和阴影效果,经常使用于ListView或RecyclerView中Item布局的根节点
优秀作品展现:
博客推荐 : https://yq.aliyun.com/articles/5975
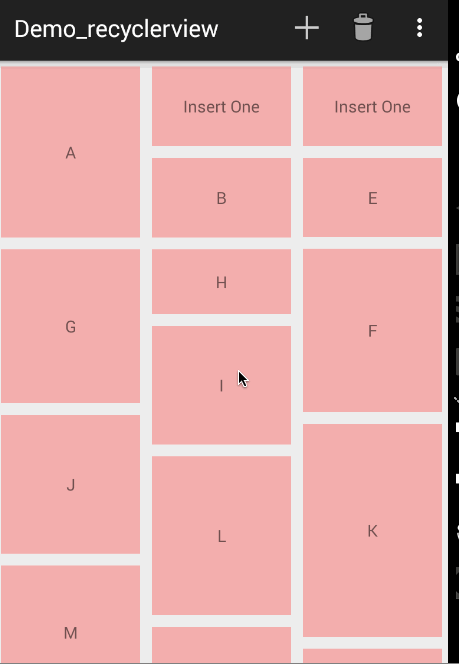
3 . com.android.support:recyclerview-v7
recyclerview
高度解耦 , 异常灵活 , 可以用来代替ListView / GridView
使用步骤:
1.导包
2.在布局文件中添加RecyclerView
3.在Java代码中实现RecyclerView, 最少要添加两个属性:
recyclerView.setLayoutManager(new LinearLayoutManager(this));//指定布局管理器
recyclerView.setAdapter(adapter); //指定Adapter
4.Adapter的写法
1)创建1个自定义的ViewHolder,在里面初始化Item的每个控件
2)让自定义的Adapt而继承RecyclerView.Adapter<传入自定义的ViewHolder>
3)实现对应的方法
优秀作品展现
博客推荐 : http://blog.csdn.net/lmj623565791/article/details/45059587
4 . Material Design 自定义主题经常使用属性值
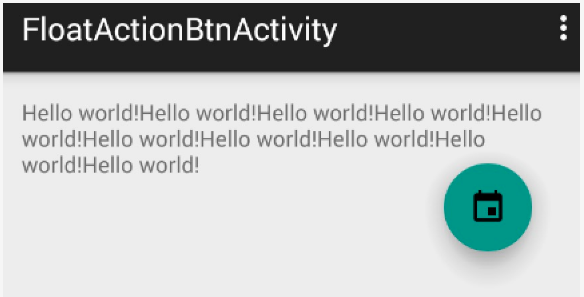
com.android.support:design包FloatingActionButton
漂浮的Button,该控件父类为ImageView,所以具有ImageView的所有属性
优秀作品展现
博客推荐 : http://blog.csdn.net/lmj623565791/article/details/46678867
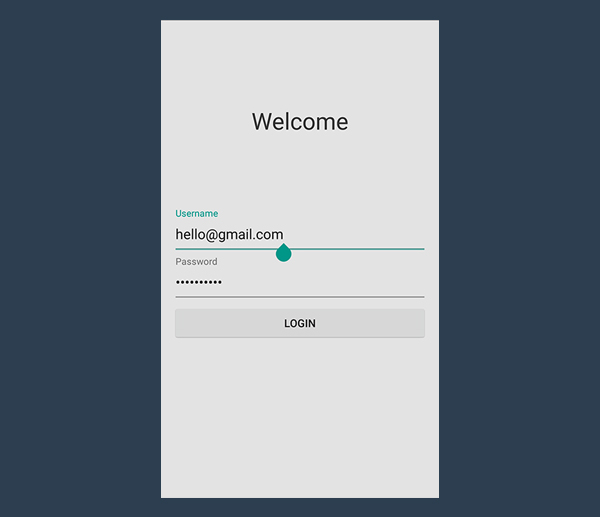
5 . com.android.support:design包.TextInputLayout
用于在EditText上显示Floating提示效果的控件。该控件内部必须包括有且只有1个EditText等输入控件。
注意:
android:hint需要设置在EditText身上
改变hint的色彩需要更改主题的colorAccent 色彩值
优秀作品展现
博客推荐 : http://www.jcodecraeer.com/a/basictutorial/2015/0821/3338.html
或http://www.jianshu.com/p/35080eb5a28f
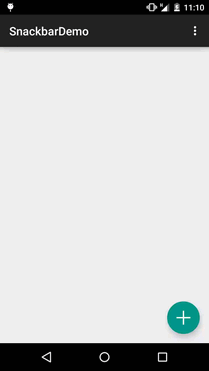
6 . com.android.support:design包.Snackbar
介于Toast和AlertDialog之间的轻量级控件,方便的实现消息的提示和动作的反馈
经常使用方法和属性
Snackbar.make(View view, CharSequence text, int duration).show();
Snackbar.setAction();
Snackbar.dismiss()
注意事项:
1.构造函数中第1个参数不能是ScrollView,由于SnackBar的实现逻辑是向view中addView,而ScrollView只能有1个childView
2.如果用SnackBar来代替Toast,需要注意的是Toast会浮在所有View之上,包括键盘.而SnakeView是在View之上addView的,所以要注意如果有键盘的时候,1定要先调用Keyboard.hide() , 否则键盘会将SnackBar遮住 .
优秀作品展现
博客推荐 : http://www.tuicool.com/articles/BfEbMvB或http://www.jcodecraeer.com/plus/view.php?aid=3187
7 . com.android.support:design包.TabLayout
封装好了tab页和唆使器
经常使用方法及属性
addTab(TabLayout.Tab tab, boolean setSelected)    //添加Tab
addTab(TabLayout.Tab tab, int position)
addTab(TabLayout.Tab tab, int position, boolean setSelected)
newTab()   //创建Tab
setOnTabSelectedListener(TabLayout.OnTabSelectedListener onTabSelectedListener)  //设置监听
setTabTextColors(int normalColor, int selectedColor)  //设置被选中Tab的文字的色彩
setSelectedTabIndicatorColor(int color)   //设置被选中Tab唆使条的色彩
setSelectedTabIndicatorHeight(int height)  //设置被选中Tab唆使条的高度
setTabMode(int mode)  //设置Tab的模式  MODE_FIXED/MODE_SCROLLABLE
注意:
与ViewPager结合Fragment使用,PagerAdapter必须重写getPageTitle()方法
设置适配器:
tabLayout.setupWithViewPager(ViewPager viewPager)  //必须在ViewPager.setAdapter() 以后调用

tabLayout.setTabsFromPagerAdapter(PagerAdapter adapter)
优秀作品展现
博客推荐 : http://www.cnblogs.com/JohnTsai/p/4715454.html
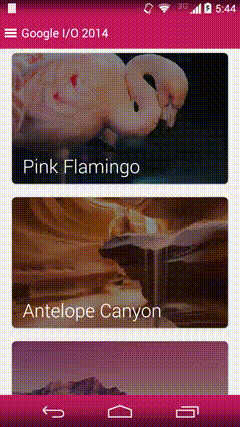
8 . com.android.support:palette-v7包
动态色采
想一想如果根据图片来决定标题的色彩和标题栏的背风景,这样视觉上是否是具有很强的冲击力和新鲜感,而不像统1色调那样呆板。
Palette类也是Android5.0引进来的1个获得Bitmap色彩值的1个类。
例 : 以下异步取得bitmap图片色彩值并利用
 Palette.from(bitmap).generate(new Palette.PaletteAsyncListener() {             @Override
            public void onGenerated(Palette palette) {
                Palette.Swatch vibrant = palette.getVibrantSwatch();//有活力
                if (vibrant != null) {
                    holder.title.setBackgroundColor(                             vibrant.getRgb());                     holder.title.setTextColor(
                            vibrant.getTitleTextColor());                 }             }         });
Android装备中,对图象的处理有多是耗时操作,因此,Palette类通过异步接口onGenerated回调的方法
来取得Bitmap的色彩值。Palette类取得的色彩值有以下几种类型:
Palette.Swatch a = palette.getVibrantSwatch();//有活力
Palette.Swatch b = palette.getDarkVibrantSwatch();//有活力 暗色
Palette.Swatch c = palette.getLightVibrantSwatch();//有活力 亮色
Palette.Swatch d = palette.getMutedSwatch();//柔和
Palette.Swatch e = palette.getDarkMutedSwatch();//柔和 暗色
Palette.Swatch f = palette.getLightMutedSwatch();//柔和 亮色 我们从以上色彩中可以获得到以下色彩值:

int color1 = a.getBodyTextColor();//内容色彩
int color2 = a.getTitleTextColor();//标题色彩
int color3 = a.getRgb();//rgb色彩
优秀作品展现
博客推荐 : http://www.jcodecraeer.com/a/anzhuokaifa/androidkaifa/2015/0304/2532.html
9 . com.android.support:design包.CoordinatorLayout
更加强大的FrameLayout。
主要用于以下情形:
1.作为1个布局的根布局
2.作为1个为childView之间调和手势效果的调和视图
主要属性:
app:layout_scrollFlags:控制那个childView可滑动
属性值:
1.scroll: 所有想转动出屏幕的view都需要设置这个flag,没有设置这个flag的view将被固定在屏幕顶部
2.enterAlways: 这个flag让任意向下的转动都会致使该view变成可见,启用快速“返回模式”
3.enterAlwaysCollapsed: 当你的视图已设置minHeight属性又使用此标志时,你的视图只能以最小高度进入,只有当转动视图到达顶部时才扩大到完全高度
4.exitUntilCollapsed: 转动退出屏幕,最后折叠在顶端
优秀作品展现
博客推荐 : http://www.jcodecraeer.com/a/anzhuokaifa/androidkaifa/2015/0717/3196.html
10 . com.android.support:design包.AppBarLayout
1个垂直方向的LinearLayout,实现了Matrerial Design效果的App Bar,支持滑动手势操作。
注意事项:
1.必须作为CoordinatorLayout的childView使用,否则很多殊效没法实现。
2.同级控件中,必须有1个可转动的siblingView,不然你用我干吗呢?
实现滑动的步骤:
1.CoordinatorLayout必须作为全部布局的父布局容器
2.CoordinatorLayout布局下包裹1个可以滑动的布局,比如 RecyclerView,NestedScrollView(ListView,ScrollView不支持)
3.给AppBarLayout设置app:layout_scrollFlags=”scroll|enterAlways” 属性
4.给可滑动的组件,也就是RecyclerView 或 NestedScrollView 设置以下属性:
app:layout_behavior="@string/appbar_scrolling_view_behavior"优秀作品展现
博客推荐 : http://www.jianshu.com/p/d159f0176576
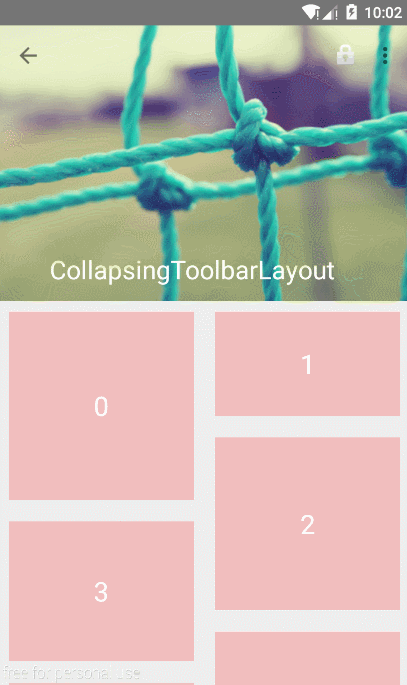
11 . com.android.support:design包.CollapsingToolbarLayout
提供1个可折叠的Toolbar容器,对容器中的不同视图设置layout_collapseMode折叠模式,来到达不同的折叠效果
指定childView折叠模式使用
app:layout_collapseMode
值:1.parallax 视差模式 , 需要增加 app:layout_collapseParallaxMultiplier 属性 , 属性值范围为 0.0⑴.0 , 必须是float类型
2.pin 固定模式
注意事项:
1.CollapsingToolbarLayout的高度必须是固定值而且要大于Toolbar的高度 , 不能使用wrap_content , 否则不会有折叠效果
2.所有需要折叠的childView必须指定app:layout_collapseMode 属性
3.如果要添加1个自动折叠的FloatingActionBar , 必须指定锚点,锚点需为CollapsingToolbarLayout的父容器
使用parallax模式的时候,app:layout_scrollFlags的属性值不能包括enterAlwaysCollapsed或enterAlways
优秀作品展现
博客推荐 : http://www.open-open.com/lib/view/open1438265746378.html
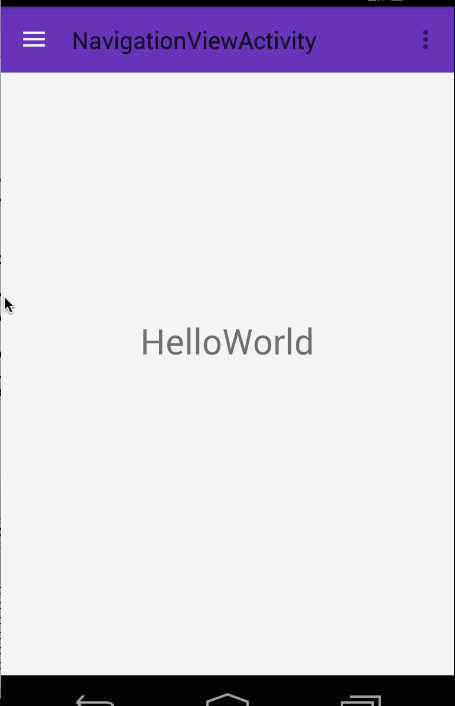
12 . com.android.support:design包.NavigationView
类似SlidingMenu
经常使用属性和方法
android:layout_gravity="left"
app:headerLayout="@layout/drawer_header"
app:menu="@menu/drawer_menu"

app:itemBackground   //指定menu背景资源
app:itemIconTint     //指定menu Icon的色彩
app:itemTextColor    //指定menu item的字体色彩
说明:app属性为控件持有的属性,需要导入包名
xmlns:app="http://schemas.android.com/apk/res-auto"
注意:
1.自动生成的代码中的Toolbar只能支持在API 21(android 5.0)以上
2.点击某1项后自动隐藏:drawerLayout.closeDrawers();
3.主布局文件,根节点标签为android.support.v4.widget.DrawerLayout
4.头部部份布局文件,drawer_header.xml
压轴大戏
1 . 先看布局:
<android.support.v4.widget.DrawerLayout
xmlns:android="http://schemas.android.com/apk/res/android"     xmlns:app="http://schemas.android.com/apk/res-auto"     android:id="@+id/drawer_layout"
    android:layout_width="match_parent"     android:layout_height="match_parent">
    <!-- the main content view -->
    <include layout="@layout/layout_content" />
    <!-- the navigetion view -->
<android.support.design.widget.NavigationView         android:id="@+id/navigationView"         android:layout_width="wrap_content"         android:layout_height="match_parent"         android:layout_gravity="left"         android:fitsSystemWindows="true"
        app:headerLayout="@layout/layout_header"         app:menu="@layout/layout_menu">
    </android.support.design.widget.NavigationView>
</android.support.v4.widget.DrawerLayout>
其中NavigationView 中的 android:layout_gravity=”start” 属性来控制抽屉菜单从哪边滑出,1般“start ”从左侧滑出,“end”从右侧滑出。
这里最主要的两个属性分别是:
1.app:headerLayout: 给NavigationView添加头部布局
2.app:menu:给NavigationView添加menu菜单布局
app:headerLayout布局以下:
<?xml version="1.0" encoding="utf⑻"?> <LinearLayout
xmlns:android="http://schemas.android.com/apk/res/android"     android:layout_width="match_parent"     android:layout_height="200dp"
android:background="@drawable/img1"     android:gravity="center"
android:orientation="vertical">
    <ImageView
        android:layout_width="125dp"            android:layout_height="125dp"           android:scaleType="centerCrop"         android:src="@drawable/image" />
    <TextView
        android:layout_marginTop="15dp"         android:layout_width="wrap_content"         android:layout_height="wrap_content"         android:text="CSDN废墟的树博客"
        android:textColor="@android:color/white" /> </LinearLayout>
app:menu 布局以下:
<?xml version="1.0" encoding="utf⑻"?>
<menu xmlns:android="http://schemas.android.com/apk/res/android"     android:layout_width="match_parent"     android:layout_height="match_parent">
    <group
        android:checkableBehavior="single"         android:title="Home items">
        <item
            android:id="@+id/nav_blog"
            android:icon="@drawable/ic_account_balance_black_24dp"             android:title="博客地址" />
        <item
            android:id="@+id/nav_ver"
            android:icon="@drawable/ic_error_outline_black_36dp"             android:title="版本信息" />
        <item
            android:id="@+id/nav_about"
            android:icon="@drawable/ic_error_outline_black_36dp"             android:title="关于我" />
    </group>
    <item android:title="Sub items">
        <menu>
            <item
                android:id="@+id/sub_exit"
android:icon="@drawable/ic_power_settings_new_black_36dp"                 android:title="退出利用" />
            <item
                android:id="@+id/sub_switch"                android:icon="@drawable/ic_settings_applications_black_36dp"                 android:title="切换主题" />
 </item>
</menu>
</menu>
代码中控制NavigationView
private void initNavigationView(){
  navigationView = (NavigationView) findViewById(R.id.navigationView);   drawerLayout = (DrawerLayout) findViewById(R.id.drawer_layout);   //设置侧滑菜单
选择监听事件
navigationView.setNavigationItemSelectedListener(new NavigationView.OnNavigationItemSelectedListener() {             @Override
            public boolean onNavigationItemSelected(MenuItem menuItem) {
                menuItem.setChecked(true);                 //关闭抽屉侧滑菜单
                drawerLayout.closeDrawers();                 return true;             }         });     }
    @Override
    public boolean onOptionsItemSelected(MenuItem item) {         if (item.getItemId() == android.R.id.home){             //打开抽屉侧滑菜单
            drawerLayout.openDrawer(GravityCompat.START);         }
        return super.onOptionsItemSelected(item);
}
关于NavigationView中item的字体色彩和icon选中状态色彩是去当前主题theme中的
<--正常状态下字体色彩和icon色彩--> <item
name="android:textColorPrimary">@android:color/darker_gray</item>
<--选中状态icon的色彩和字体色彩-->
 <item name="colorPrimary">@color/accent_material_light</item>
固然你可以通过以下方法或属性来改变这1状态.
优秀作品展现
博客推荐 : http://blog.csdn.net/lmj623565791/article/details/46405409
或http://www.jcodecraeer.com/a/anzhuokaifa/androidkaifa/2015/0303/2522.html

程序员人生,我编程,我富裕,记住wfuyu网,php教程,php学习,php手册,CMS模版制作
声明:本站大部分内容是作者原创,少部分收集于互联网供大家一起学习,原版权很多不明,如有侵权请联系本站,谢谢!
粤ICP备14040726号-1 2015-2020 程序员人生 版权所有


